

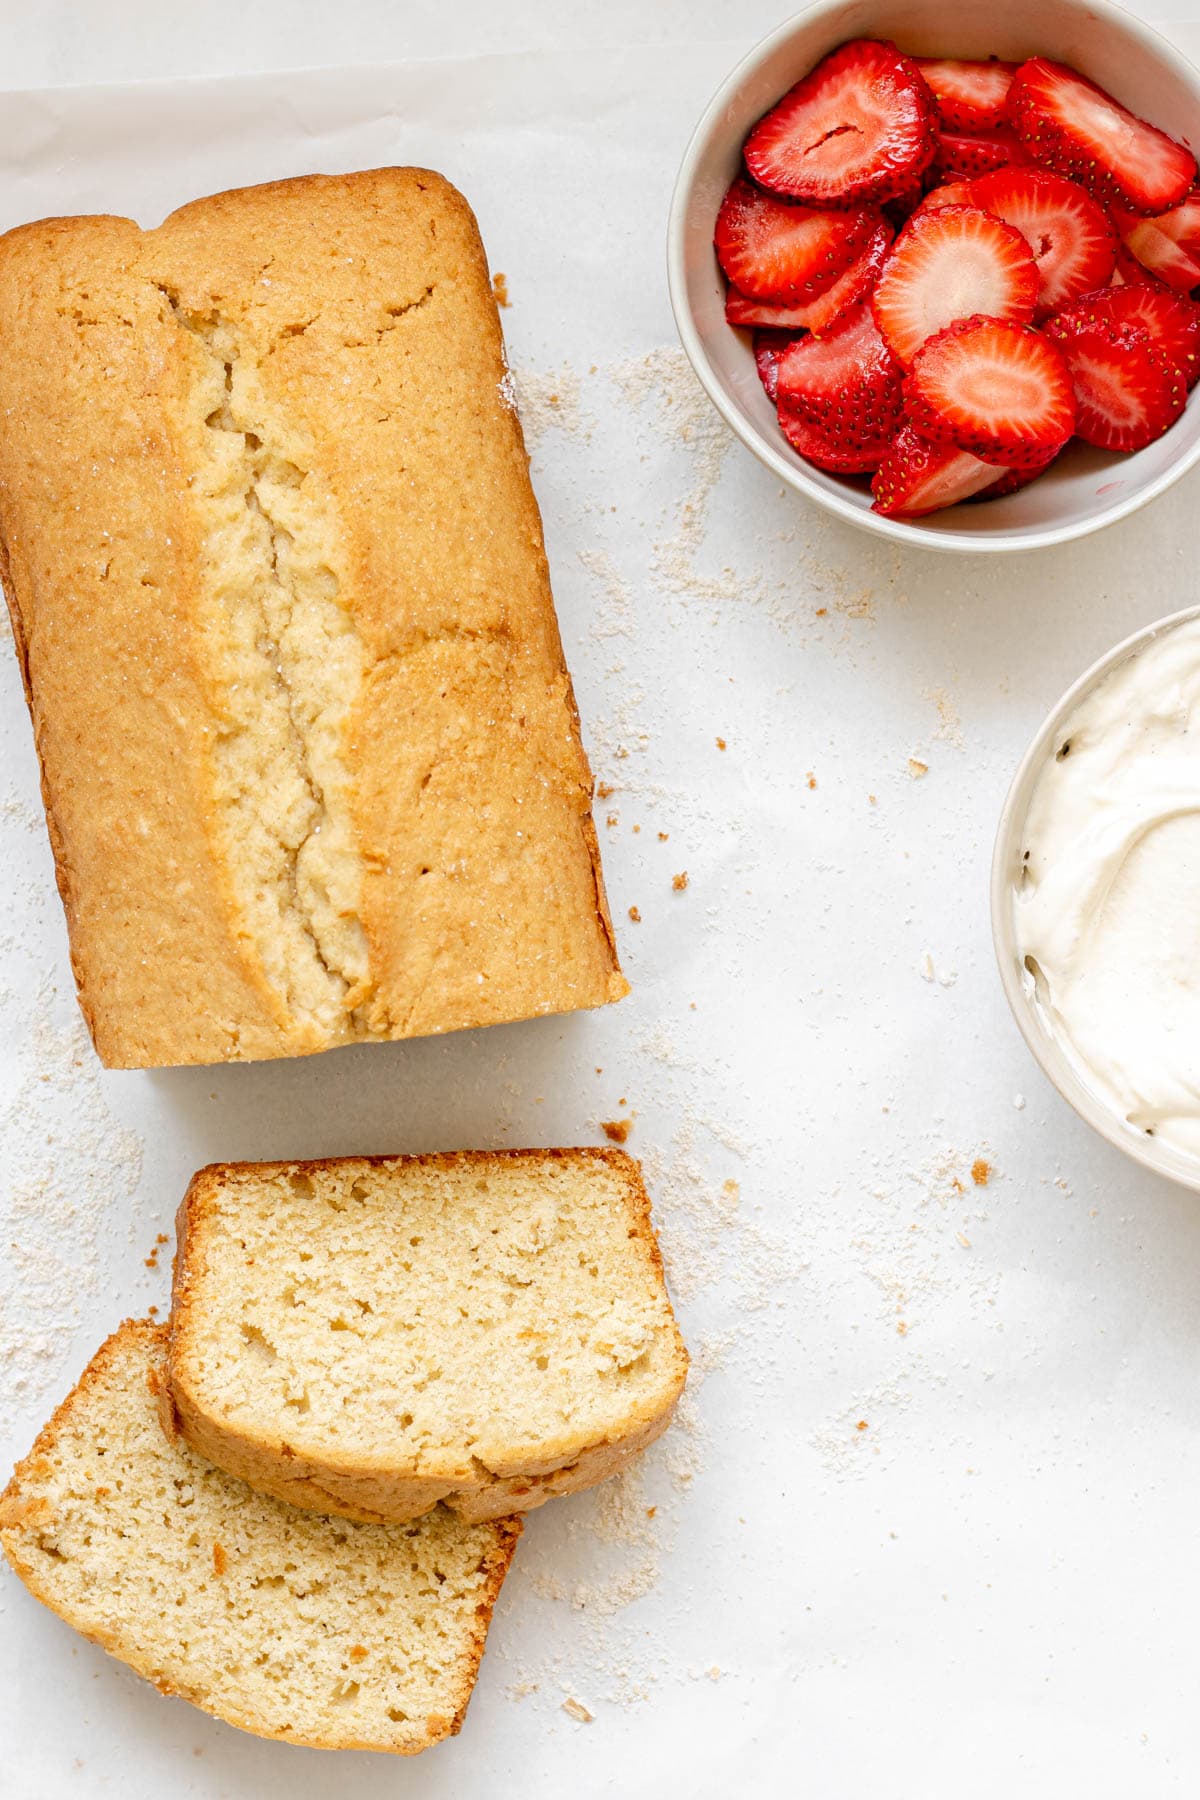
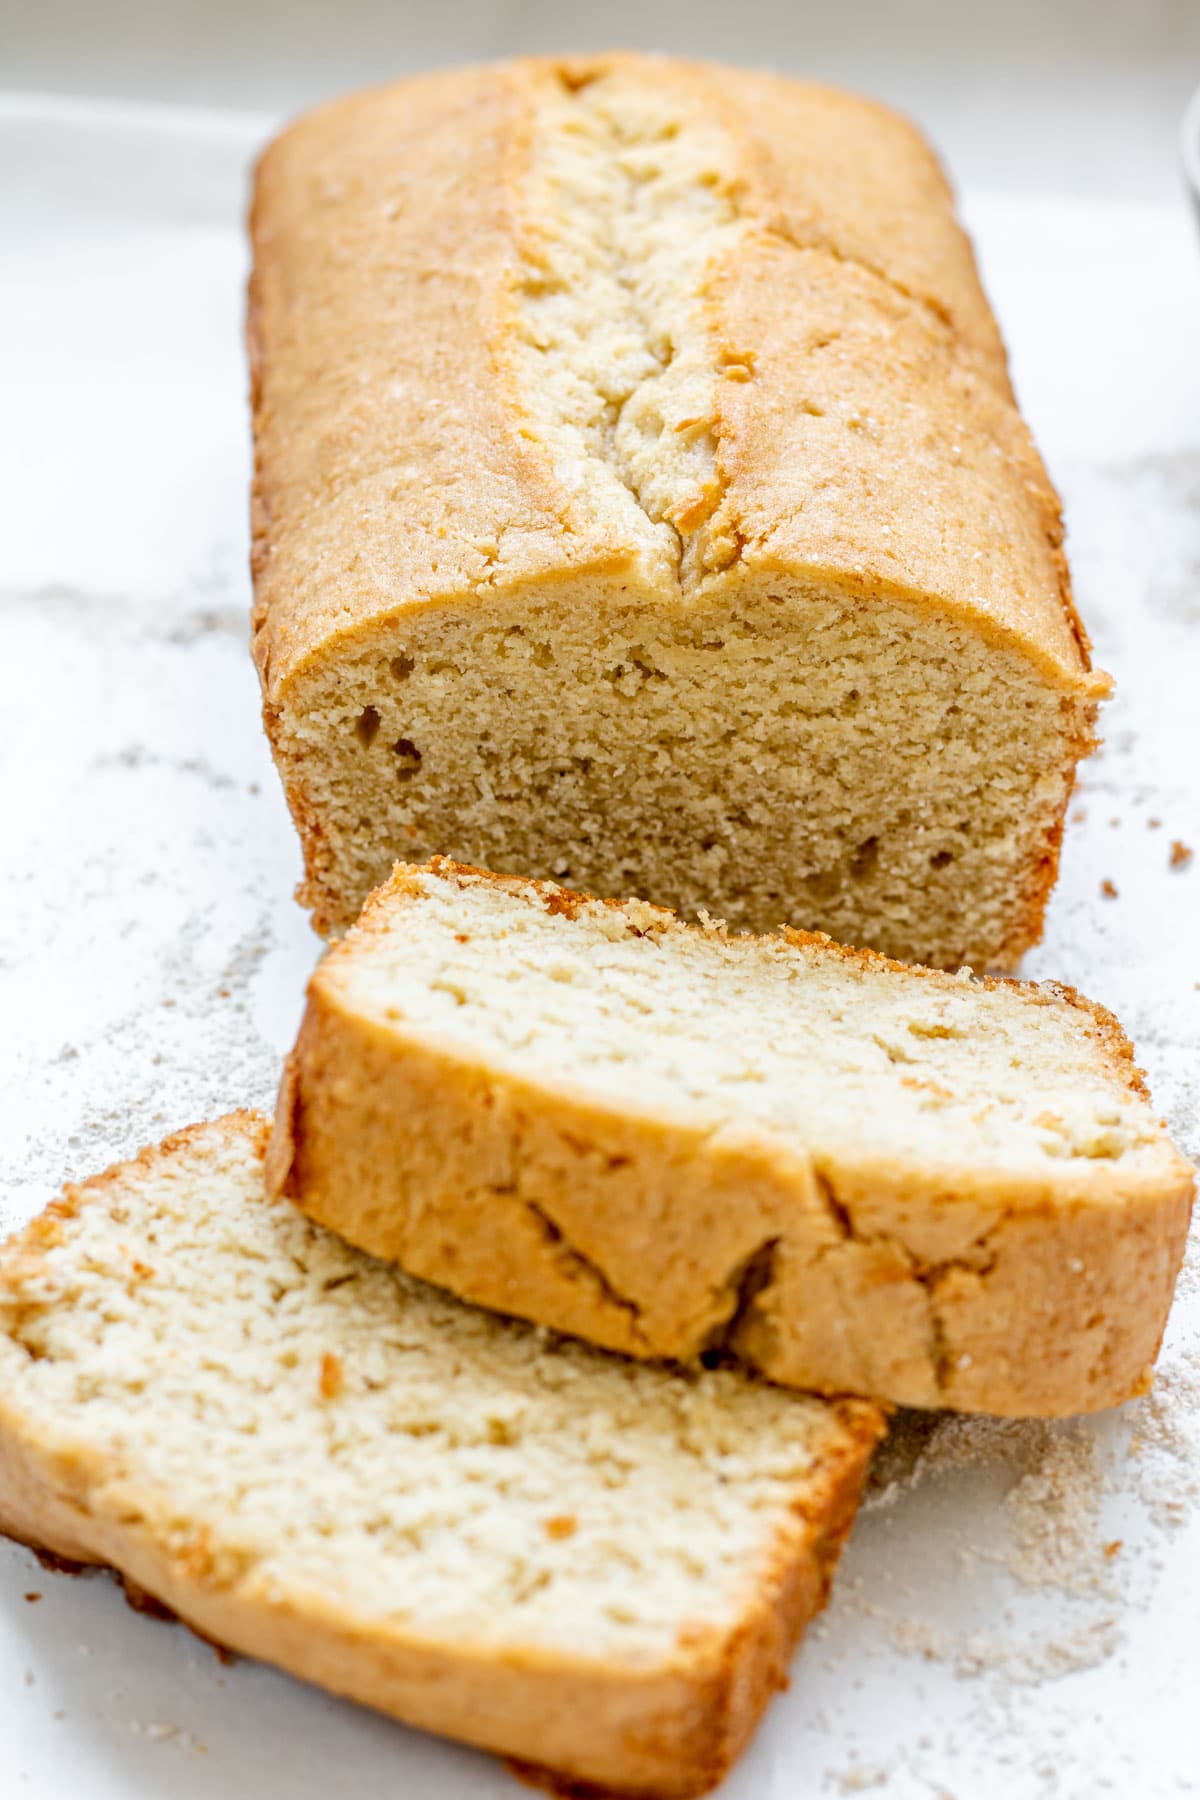
This gluten free pound cake is buttery, tender, and has the perfect bounce in every slice. It’s not a “good for gluten free” kind of cake—it’s a just plain amazing cake, full stop.

More gluten free cakes you need to try – Lemon Olive Oil Cake and Strawberry Almond Cake
Let’s be honest—many gluten free pound cakes taste grainy, dry, or just kind of sad. This one? Not even close. It’s light but substantial, made with a blend of oat flour and gluten free 1:1 flour for the perfect crumb, and so good that even my deeply skeptical, baking queen of a mom was convinced it couldn’t possibly be gluten free.
Why You'll Love This Recipe
This pound cake could fool a pastry chef (just ask my Mom).
- Perfectly buttery with a delicate crumb and golden crust
- No weird aftertaste or gritty texture—thanks to oat flour
- Cold oven method = easy and foolproof rise
- Made with basic ingredients and one bowl
- Honestly? No one will know it’s gluten free
Let's Get Baking!
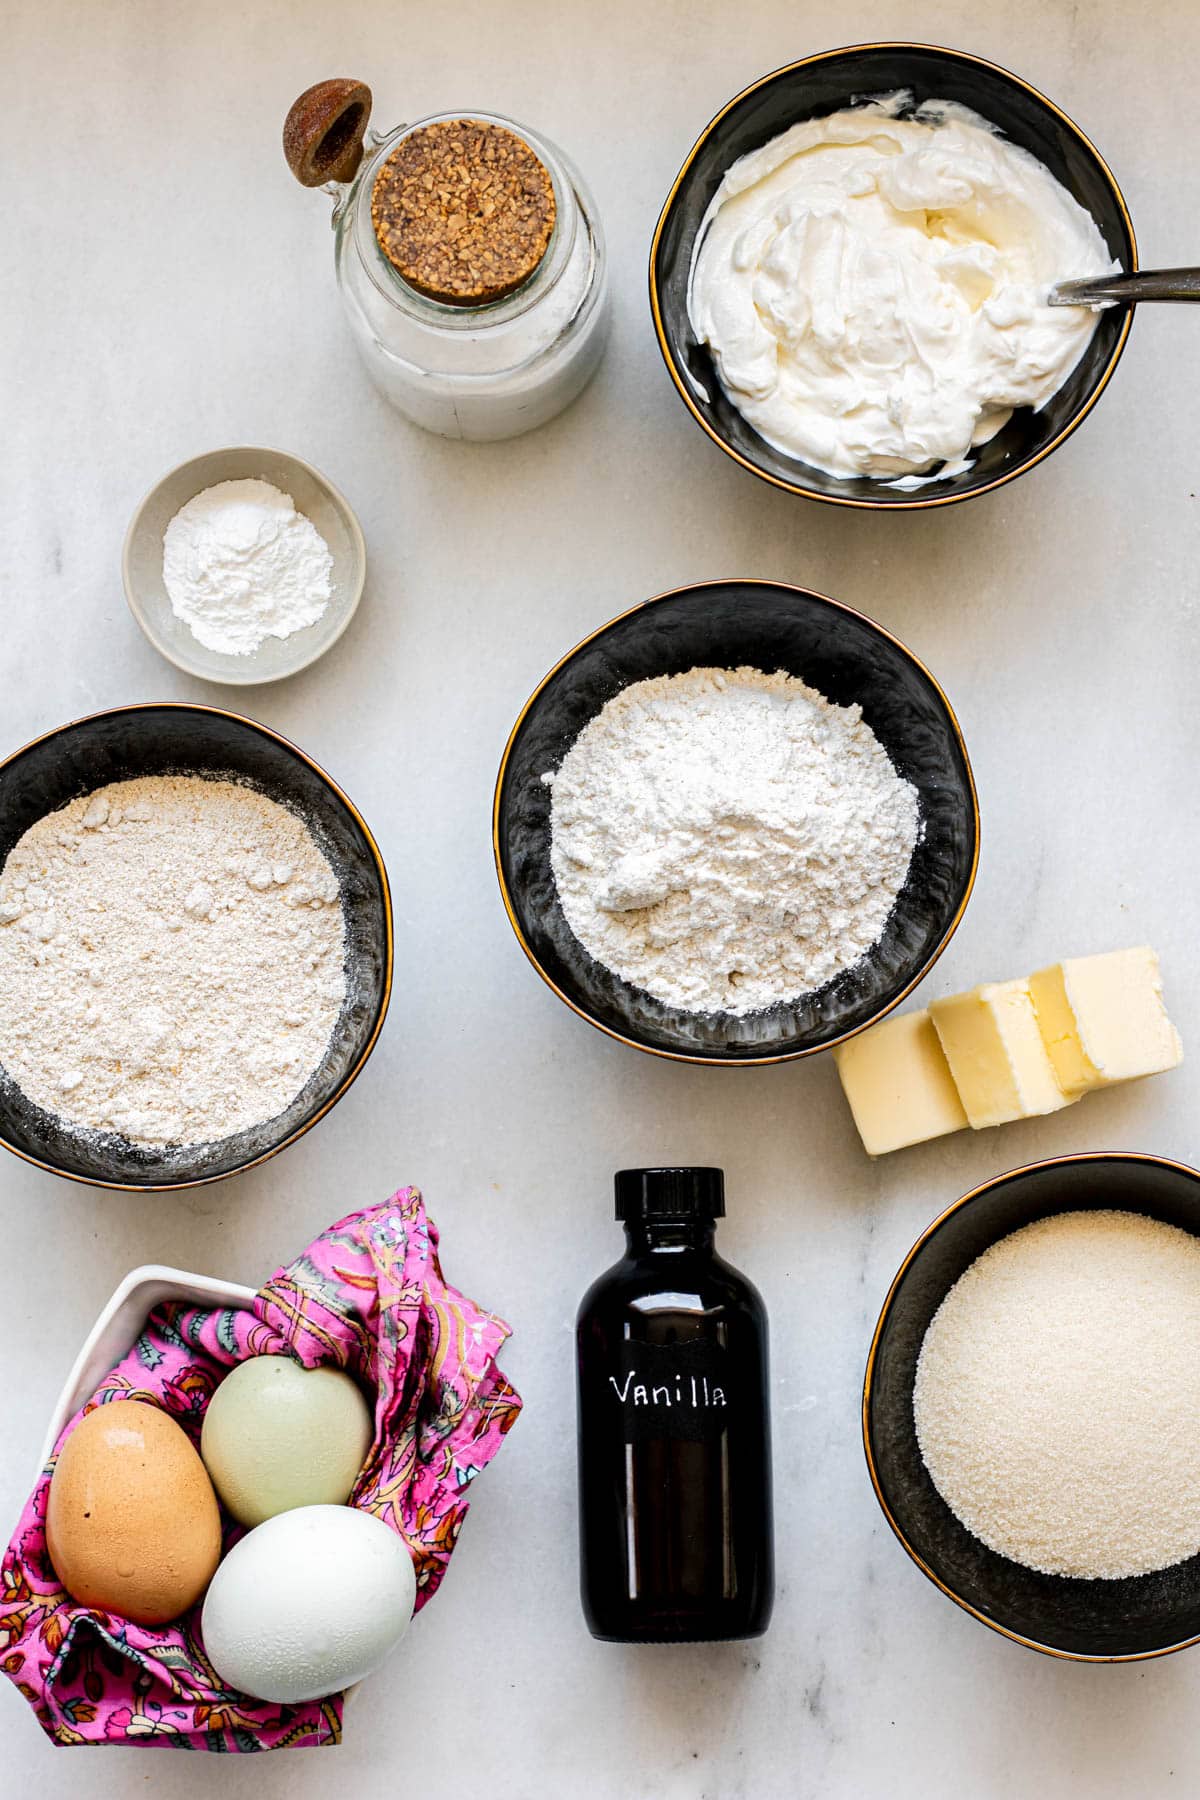
Ingredients and Substitutions
Detailed measurements can be found below in the recipe card.
We’re keeping things super simple here—just staple baking ingredients you likely already have. In this section, you’ll learn why each ingredient matters and where you can make easy swaps. Skim, grab what you need, and get on with the good part: baking. 😊
- Oat Flour – Adds tenderness and moisture without the grit. It balances out the structure of the 1:1 flour and gives this loaf that signature bounce.
- Abra’s Swap Note: No oat flour on hand? You can DIY it by blitzing rolled oats in a high-speed blender until fine. Almond flour can work, but it creates a denser, more fragile loaf.
- Gluten Free 1:1 All Purpose Flour – A must for structure and texture. I use it in combination with oat flour to avoid that all-too-common grainy GF texture. My preference is King Arthur brand 1:1 flour
- Baking Powder – Just enough to gently lift. Check the label to make sure it’s gluten free.
- Sea Salt – Don’t skip it. Just a pinch brings out the buttery flavor and keeps things from tasting flat.
- Unsalted Butter – This is a butter-forward cake (a full pound!), so use the best you can. European-style or cultured butter works beautifully.
- Pro Baker Tip: Let your butter fully soften before creaming. If it's too cold, the sugar won't incorporate properly and your texture will suffer.
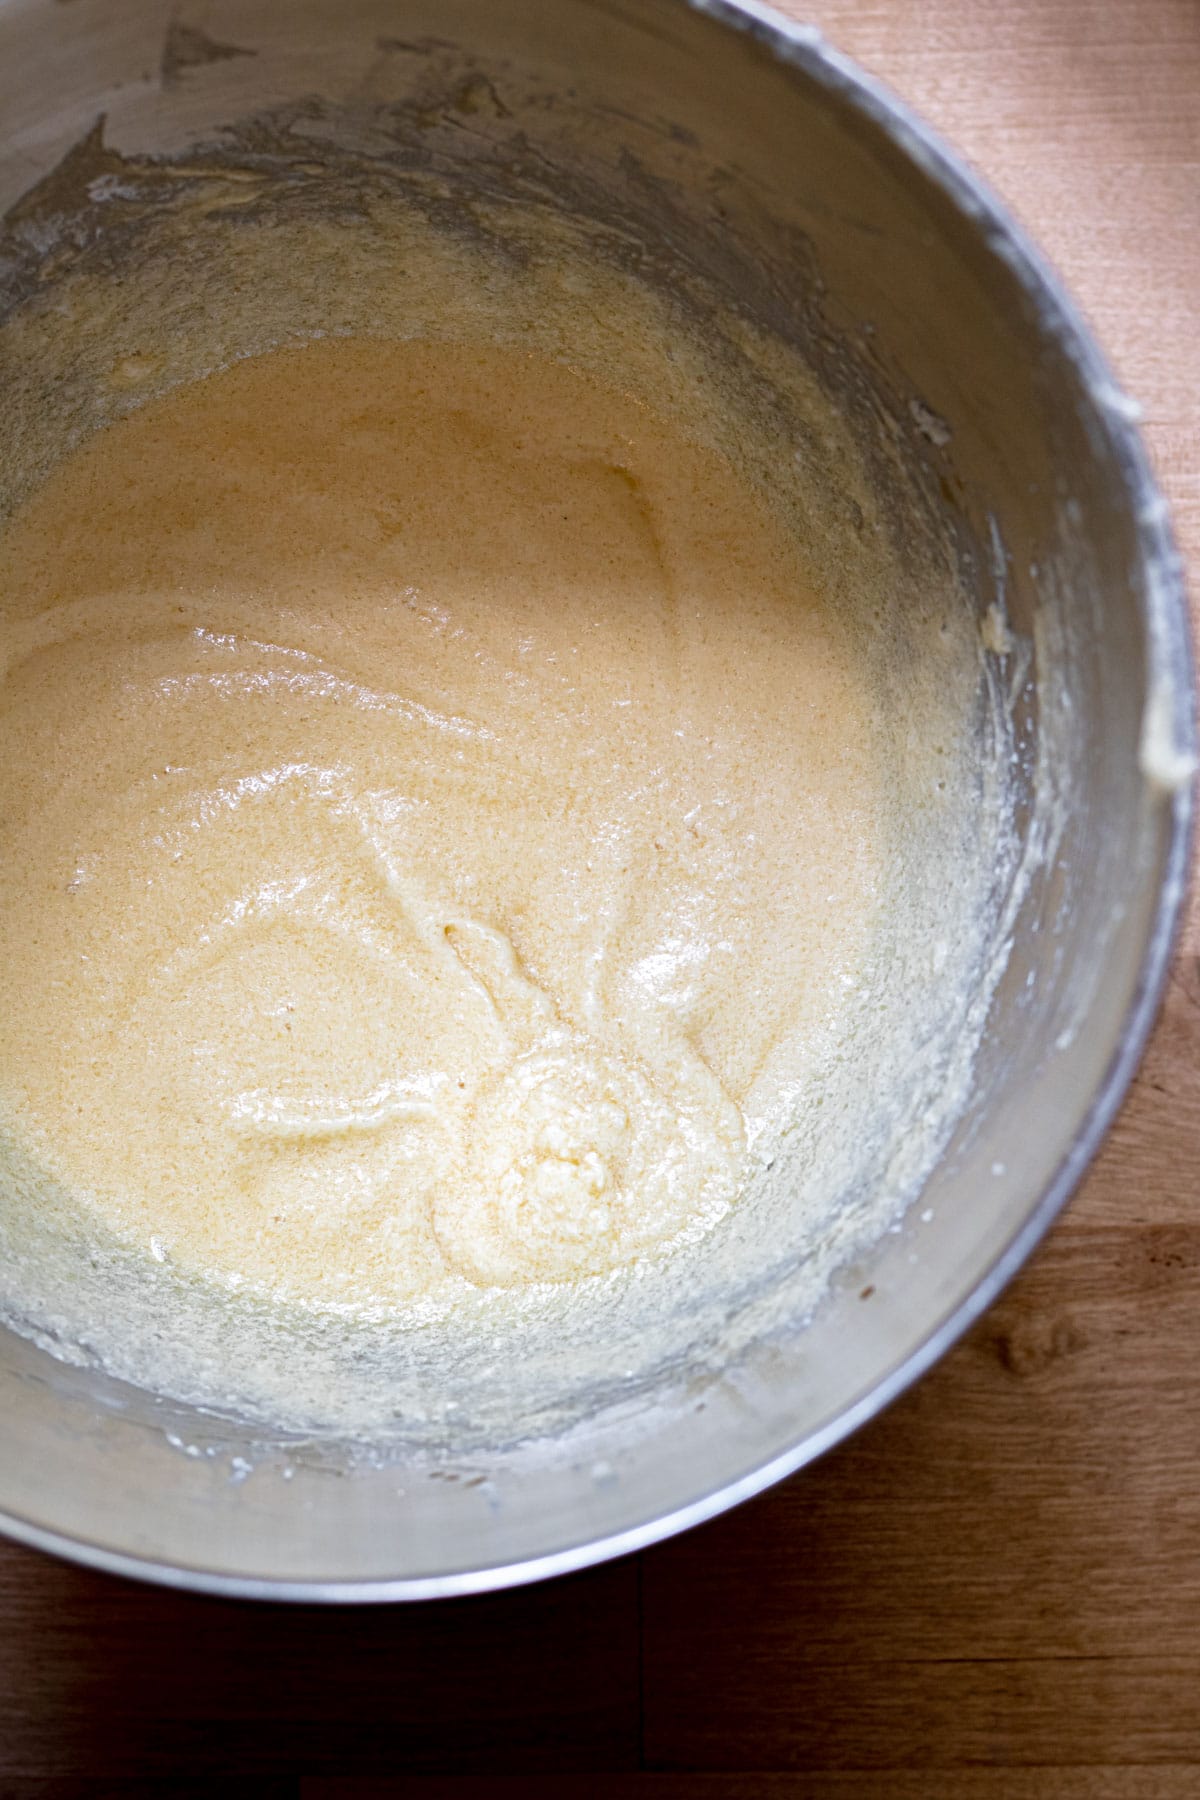
- Sugar – Loyal readers know I often lean on honey, maple syrup, or coconut sugar in my baking. But after multiple rounds of testing, I can tell you—this recipe only works with granulated sugar. The color and texture were off every time I used a less refined sweetener. I landed on organic cane sugar as a small upgrade, and I also reduced the amount typically used in pound cake. The result is just sweet enough, and the butter really shines.
- Buttermilk – Moisture, richness, and a tender crumb. If you want to keep this dairy free you can use almond milk + apple cider vinegar (I have tested the recipe this way and it works perfectly)
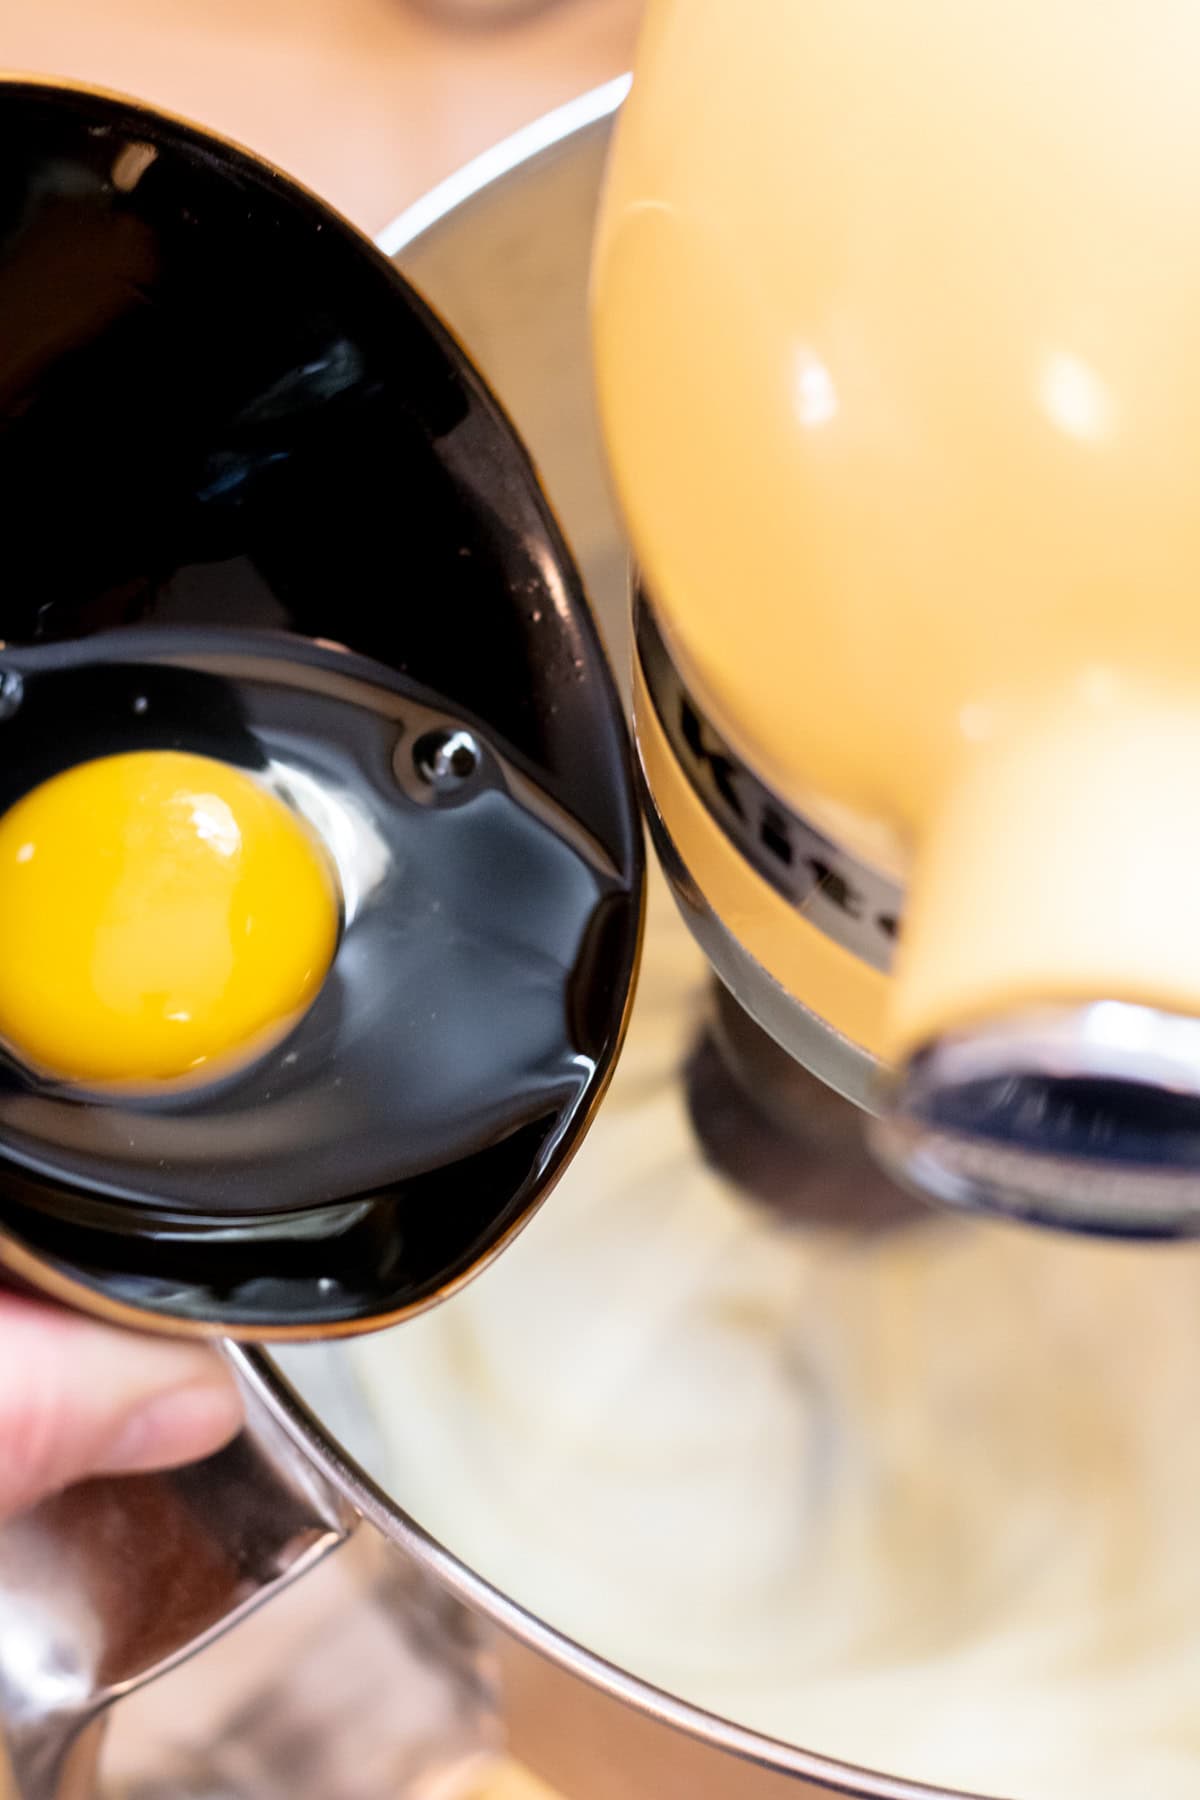
- Eggs – Adds structure, emulsification, and richness. Room temperature eggs mix more evenly.
- Vanilla Extract – Essential for that classic bakery flavor.
Tools
- Stand mixer or hand mixer (for creaming the butter)
- Large mixing bowl
- Loaf pan (9×5 recommended)
- Parchment paper
- Rubber spatula
- Cooling rack
- Optional but helpful:
- Small offset spatula to smooth the top before baking
- Cake tester or toothpick for doneness
How to Make
8 Expert Tips to Take you From Batter to Beautiful Loaf.
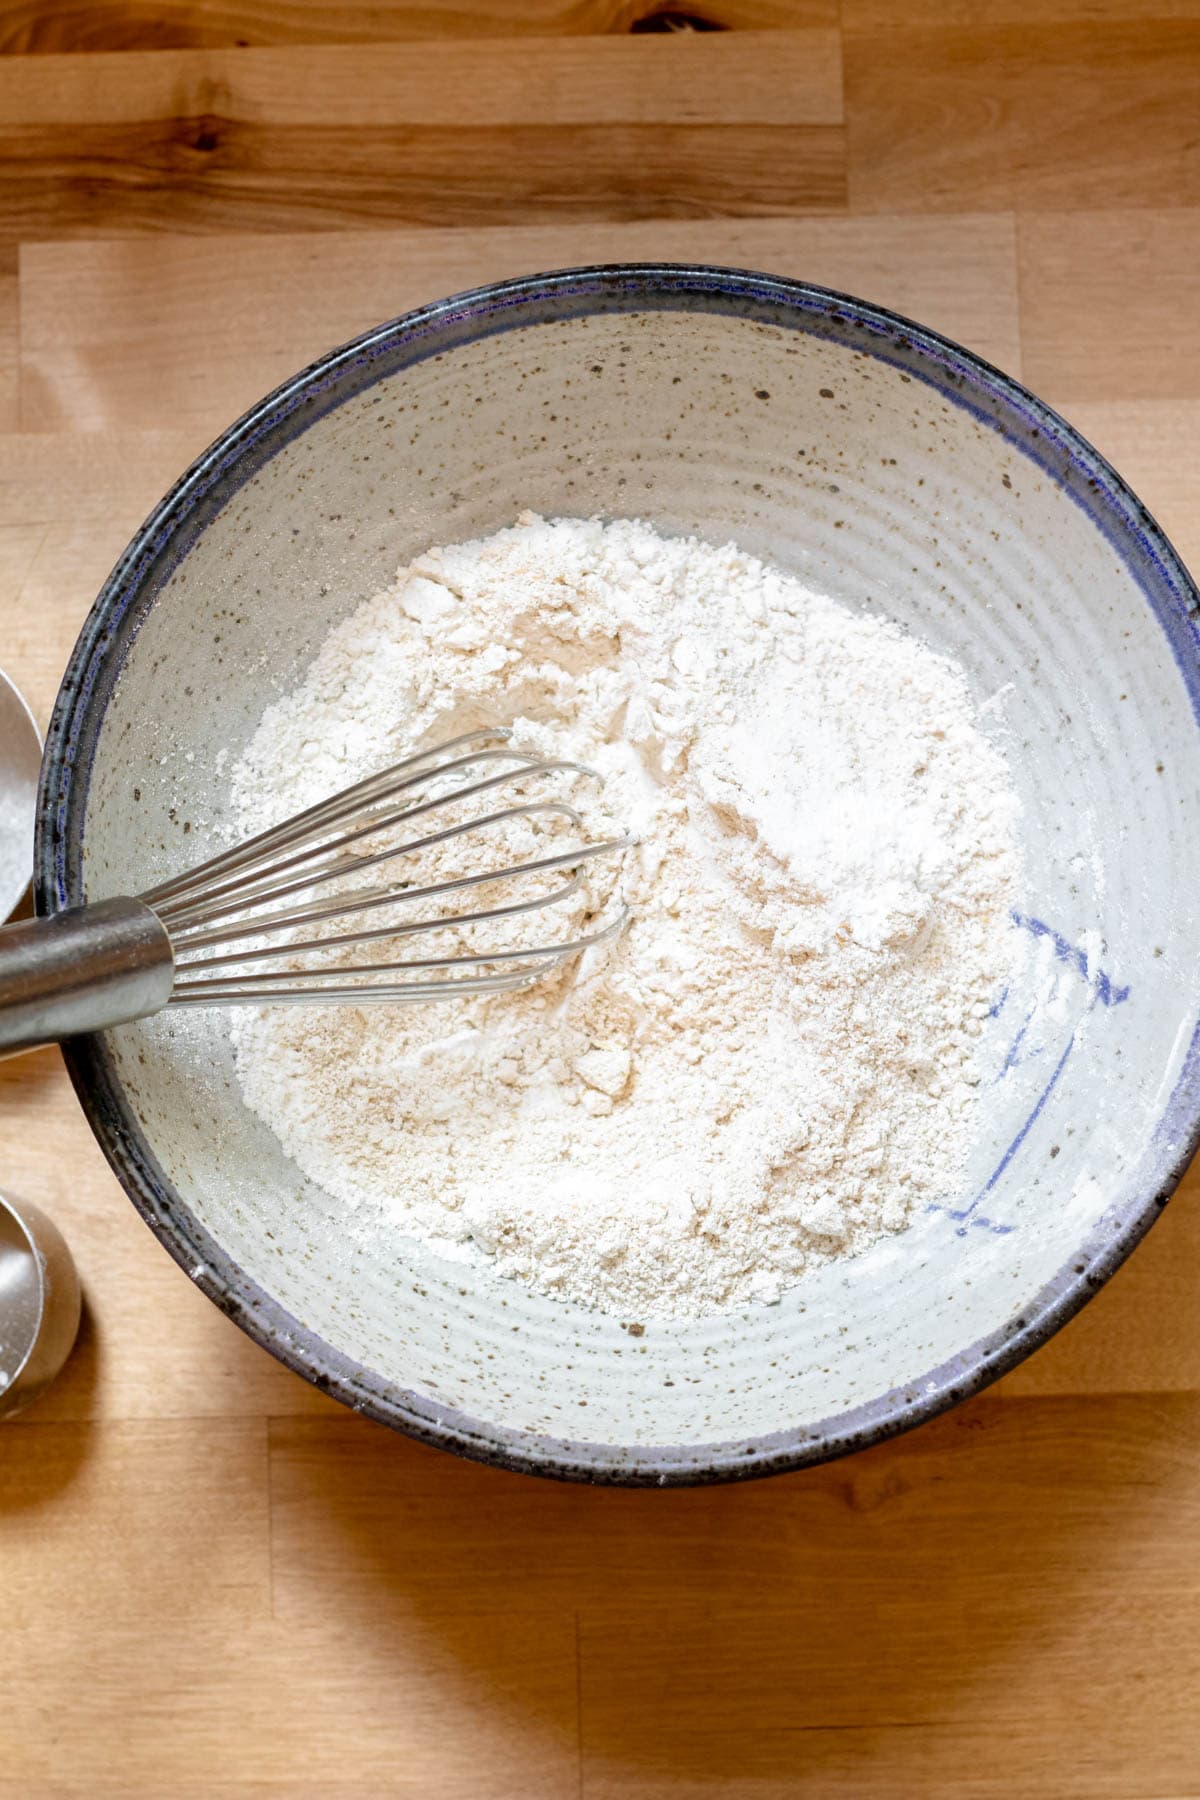

TIP #1 – Dry Ingredients. Don’t skip the oat flour.
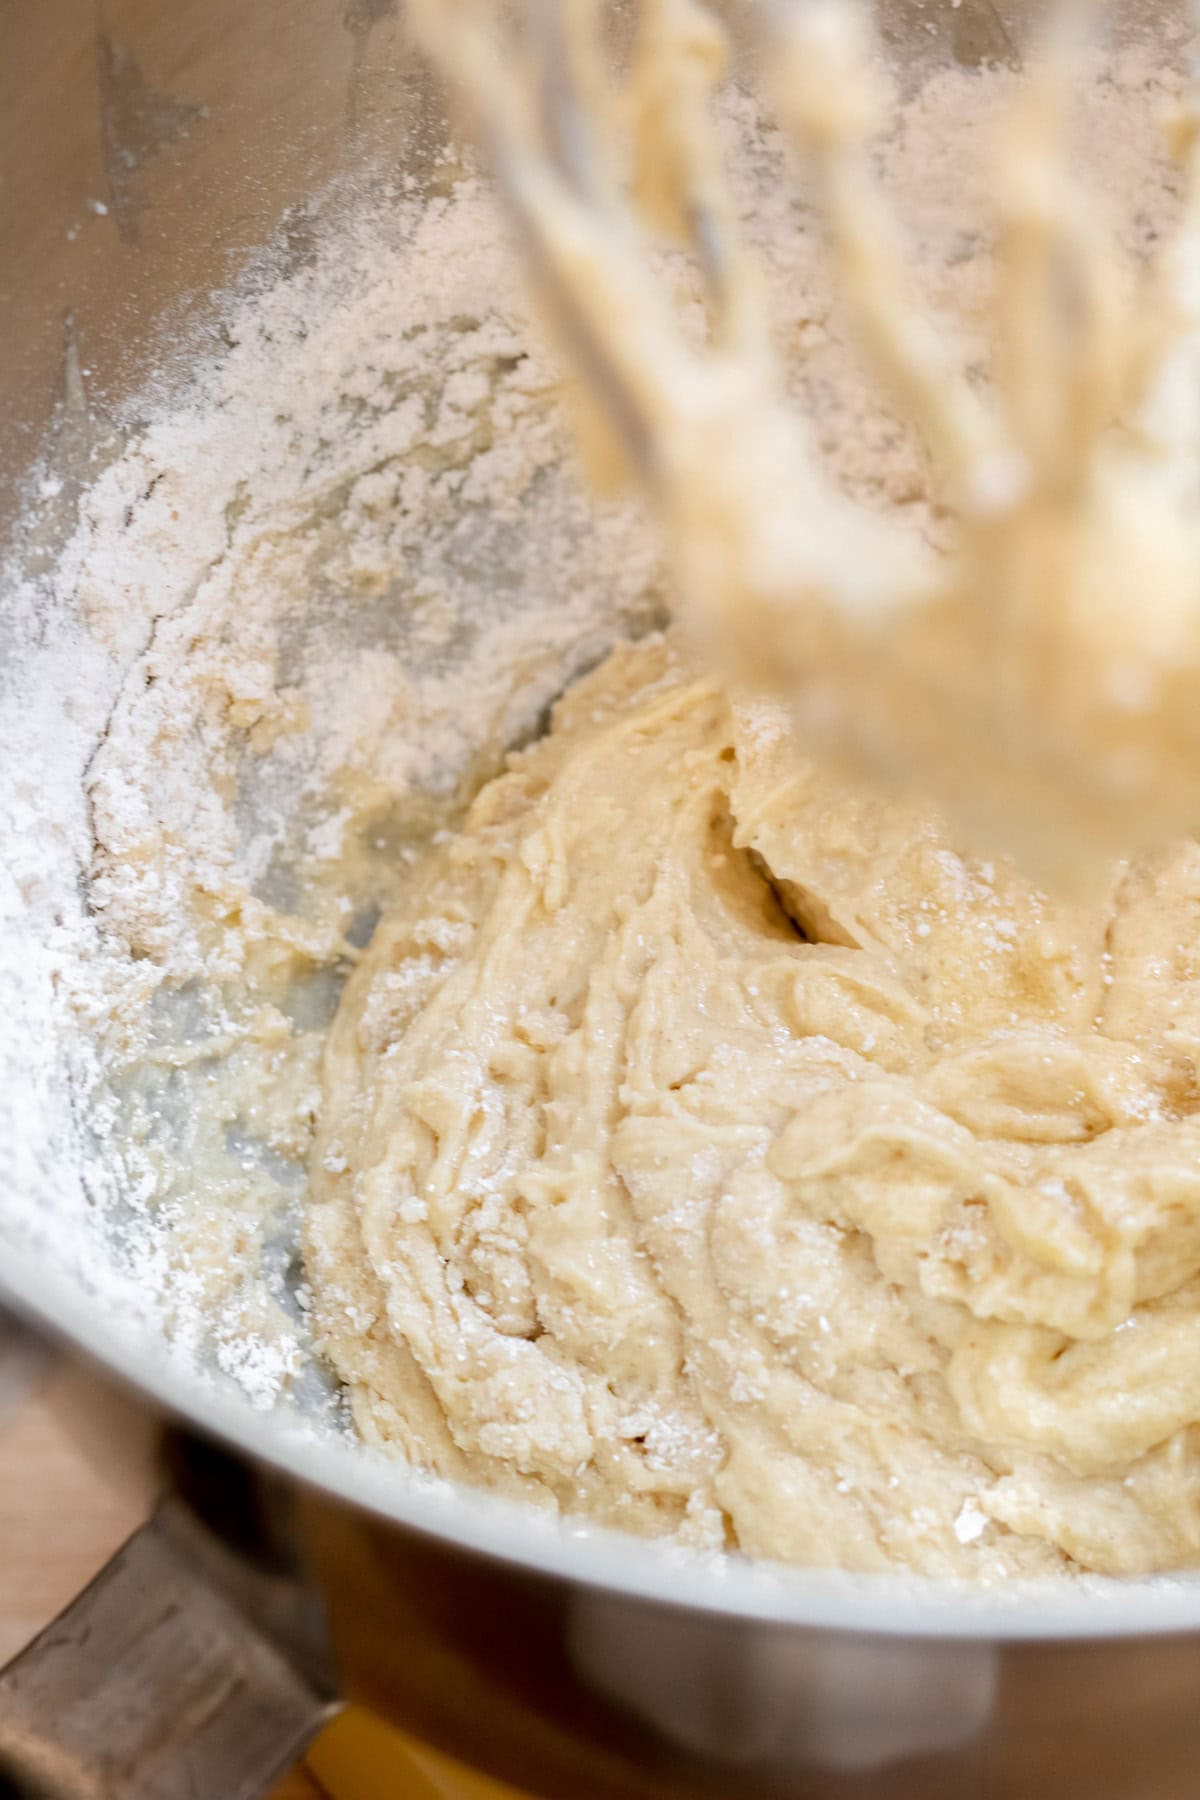
It’s not just a trendy health swap—it plays a key role in softening the texture and balancing the sometimes gritty finish of gluten free all purpose or also called 1:1 flour. Think of it as the quiet hero of this cake. I like to whisk the dry ingredients together in a separate bowl first to make sure everything’s evenly distributed before adding them to the batter. NOTE: If you want to make this an easier one bowl recipe you can just add the dry ingredients directly into the mixing bowl without combining first.
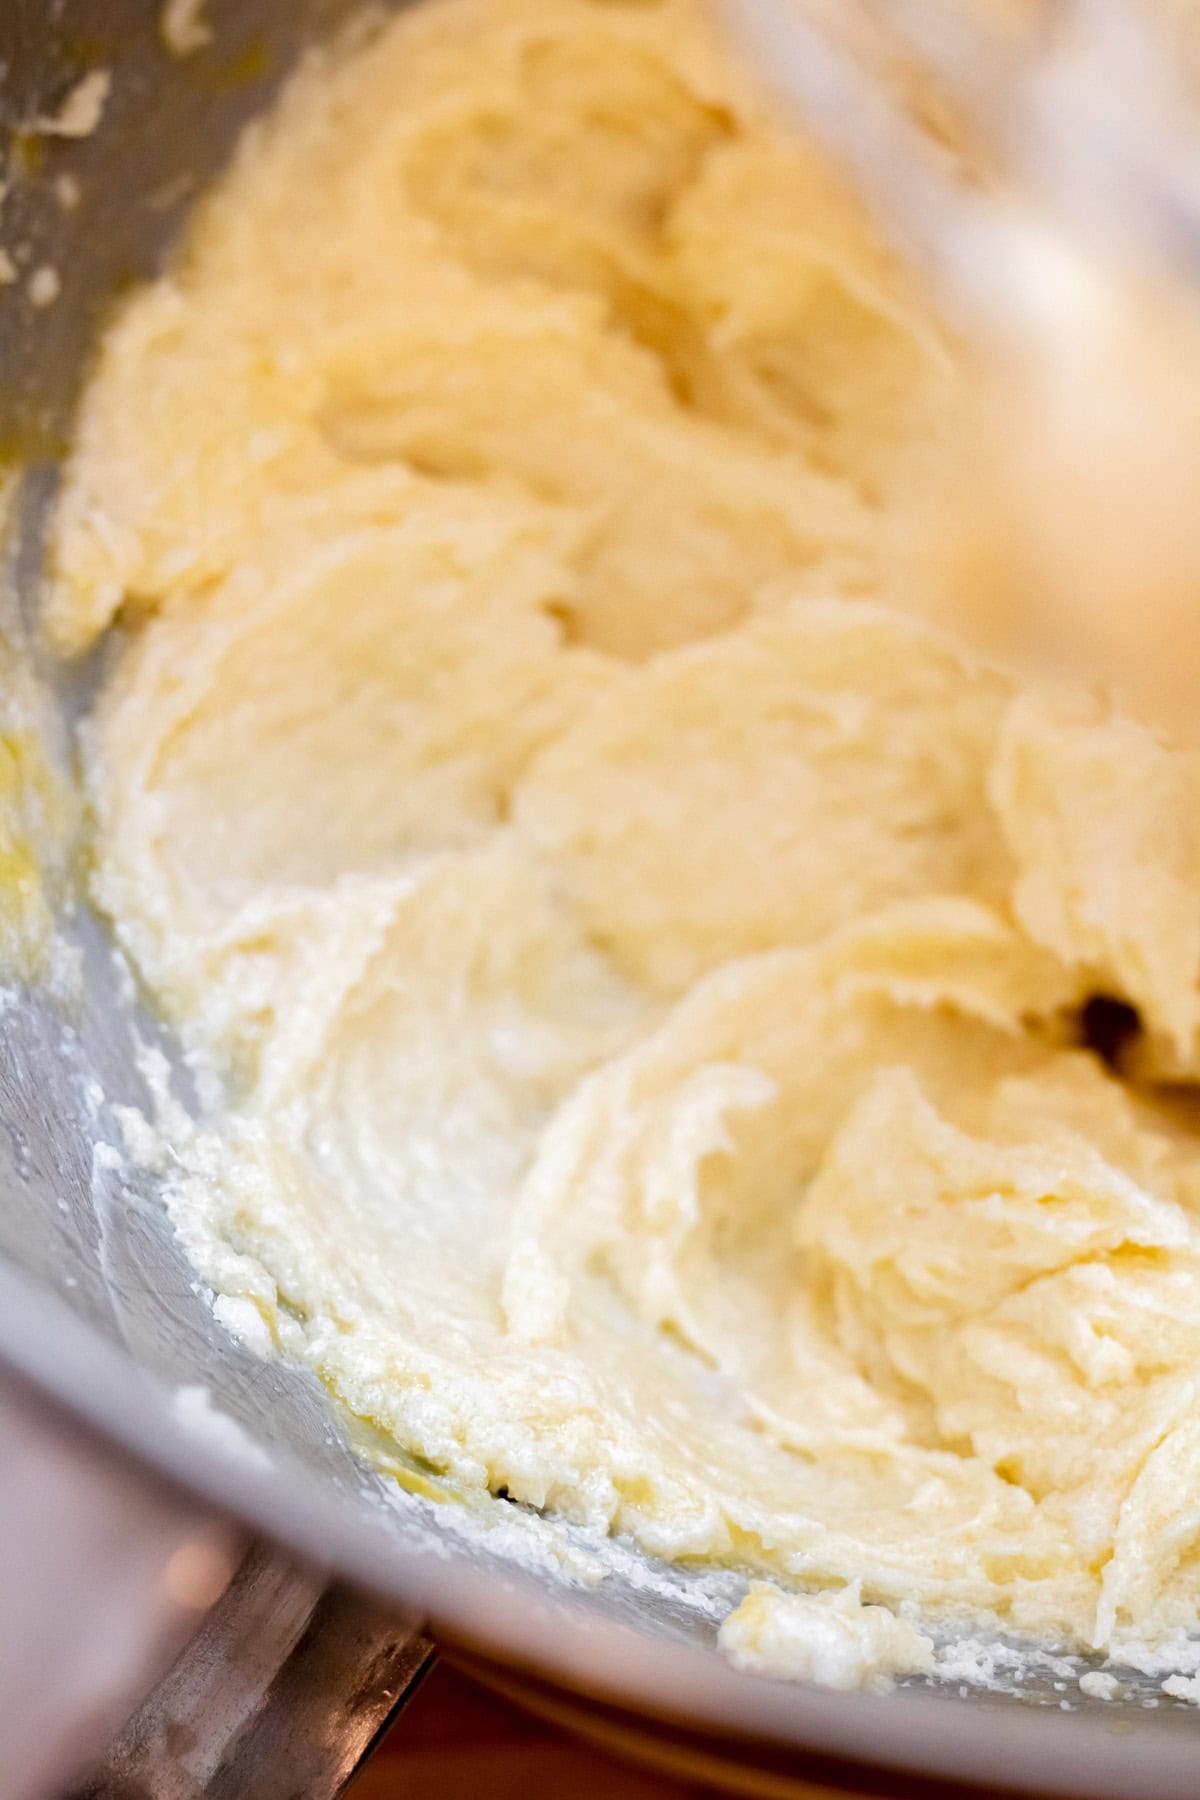
TIP #2 – Cream that butter really well.
You’re looking for light, pale, and fluffy — this can take about 3 minutes with a stand mixer. Proper creaming traps air, which helps the pound cake rise (especially since we’re starting with a cold oven). This is not a step to rush.
TIP #3 -Add the eggs one at a time, and mix until just incorporated.
Overmixing at this stage can make the cake dense. If your mixture starts to look a little curdled, don’t worry—it will come back together when you add the dry ingredients.
TIP #4 – Buttermilk = game-changer.
Buttermilk adds moisture, slight tang, and supports structure. It helps emulsify the batter and balances the richness of the butter. You can easily use almond milk or your favorite plant based milk + apple cider vinegar in place of buttermilk.
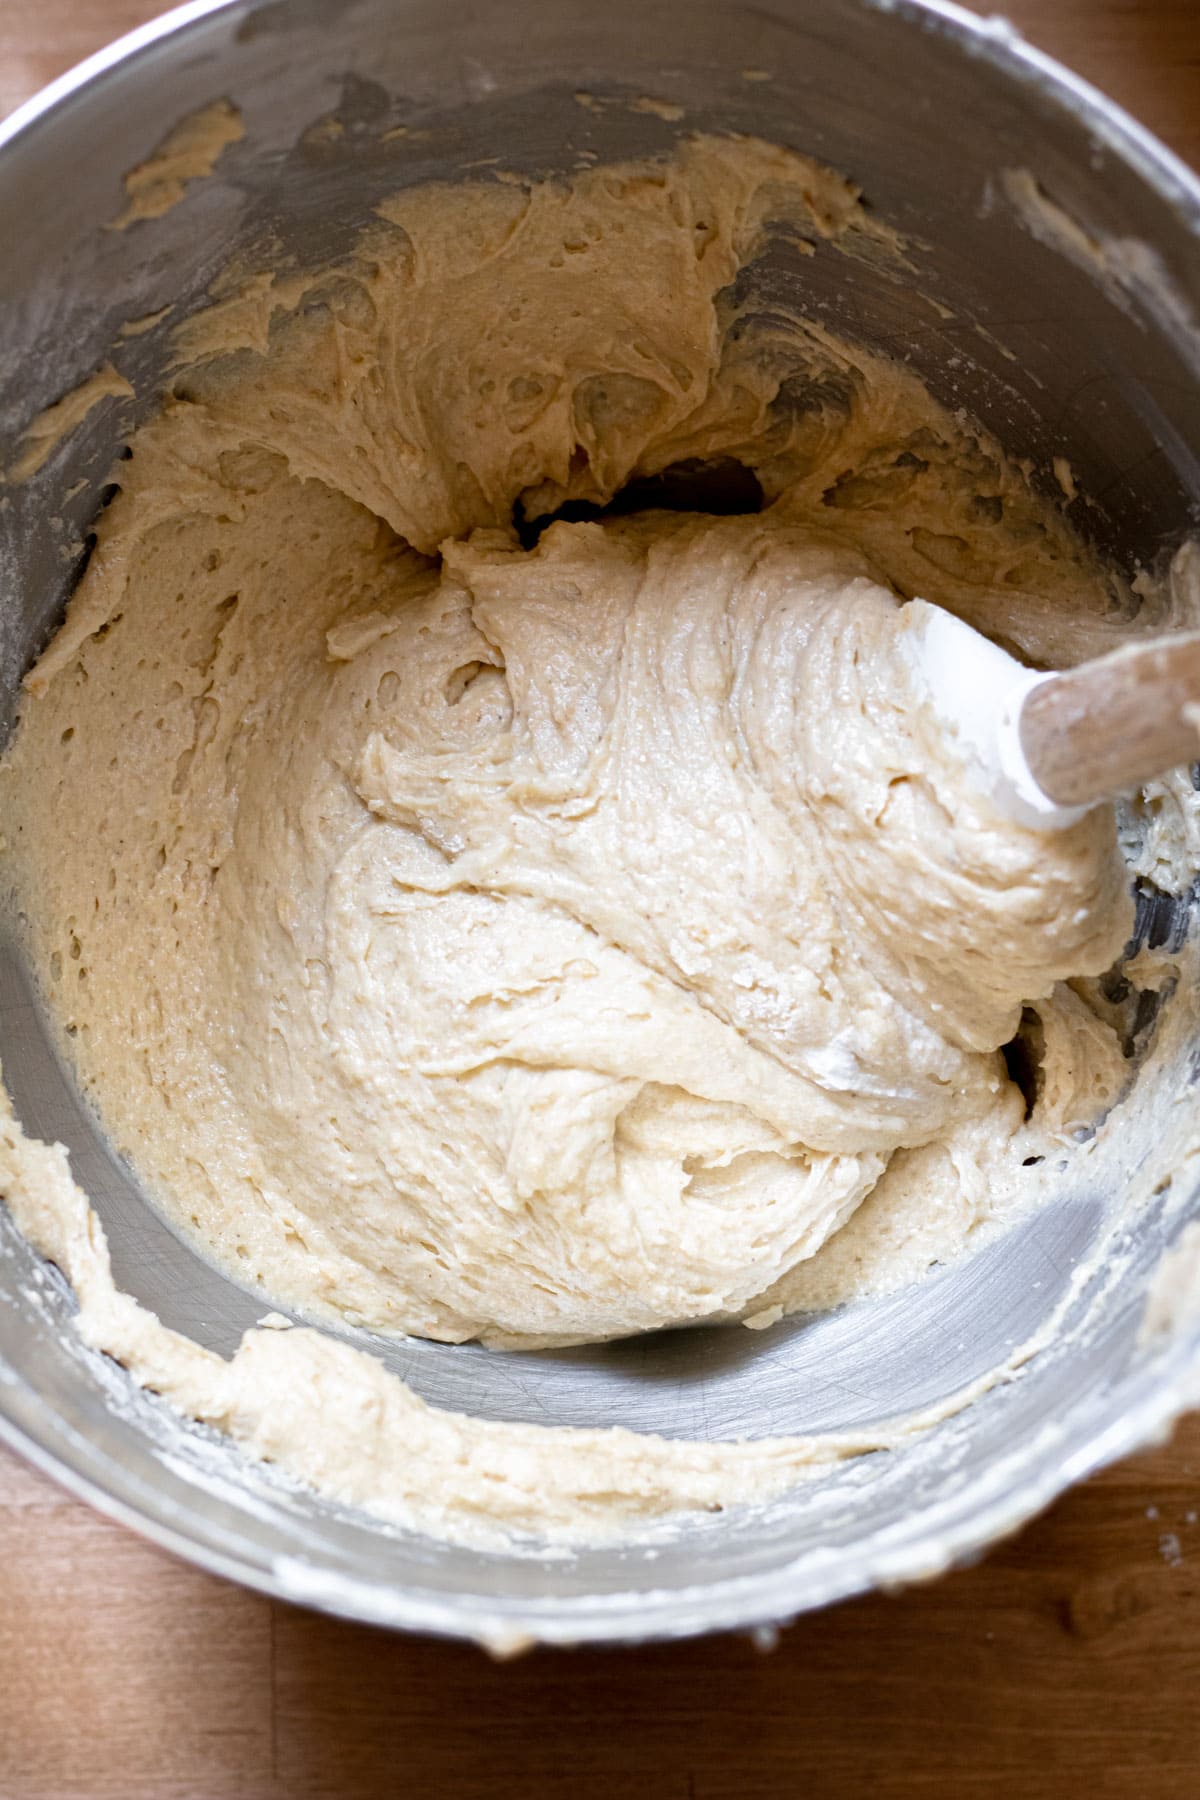
TIP #5 – Don’t overmix once the dry ingredients go in.
You want to mix until just combined. A few streaks are okay—smooth batter isn’t your goal here. Overmixing can activate the gums in GF flour too much and toughen the crumb.
TIP #6 – Line your loaf pan with parchment and grease it.
Double insurance = easy release. I like to make a small parchment sling to lift the cake out cleanly after cooling.
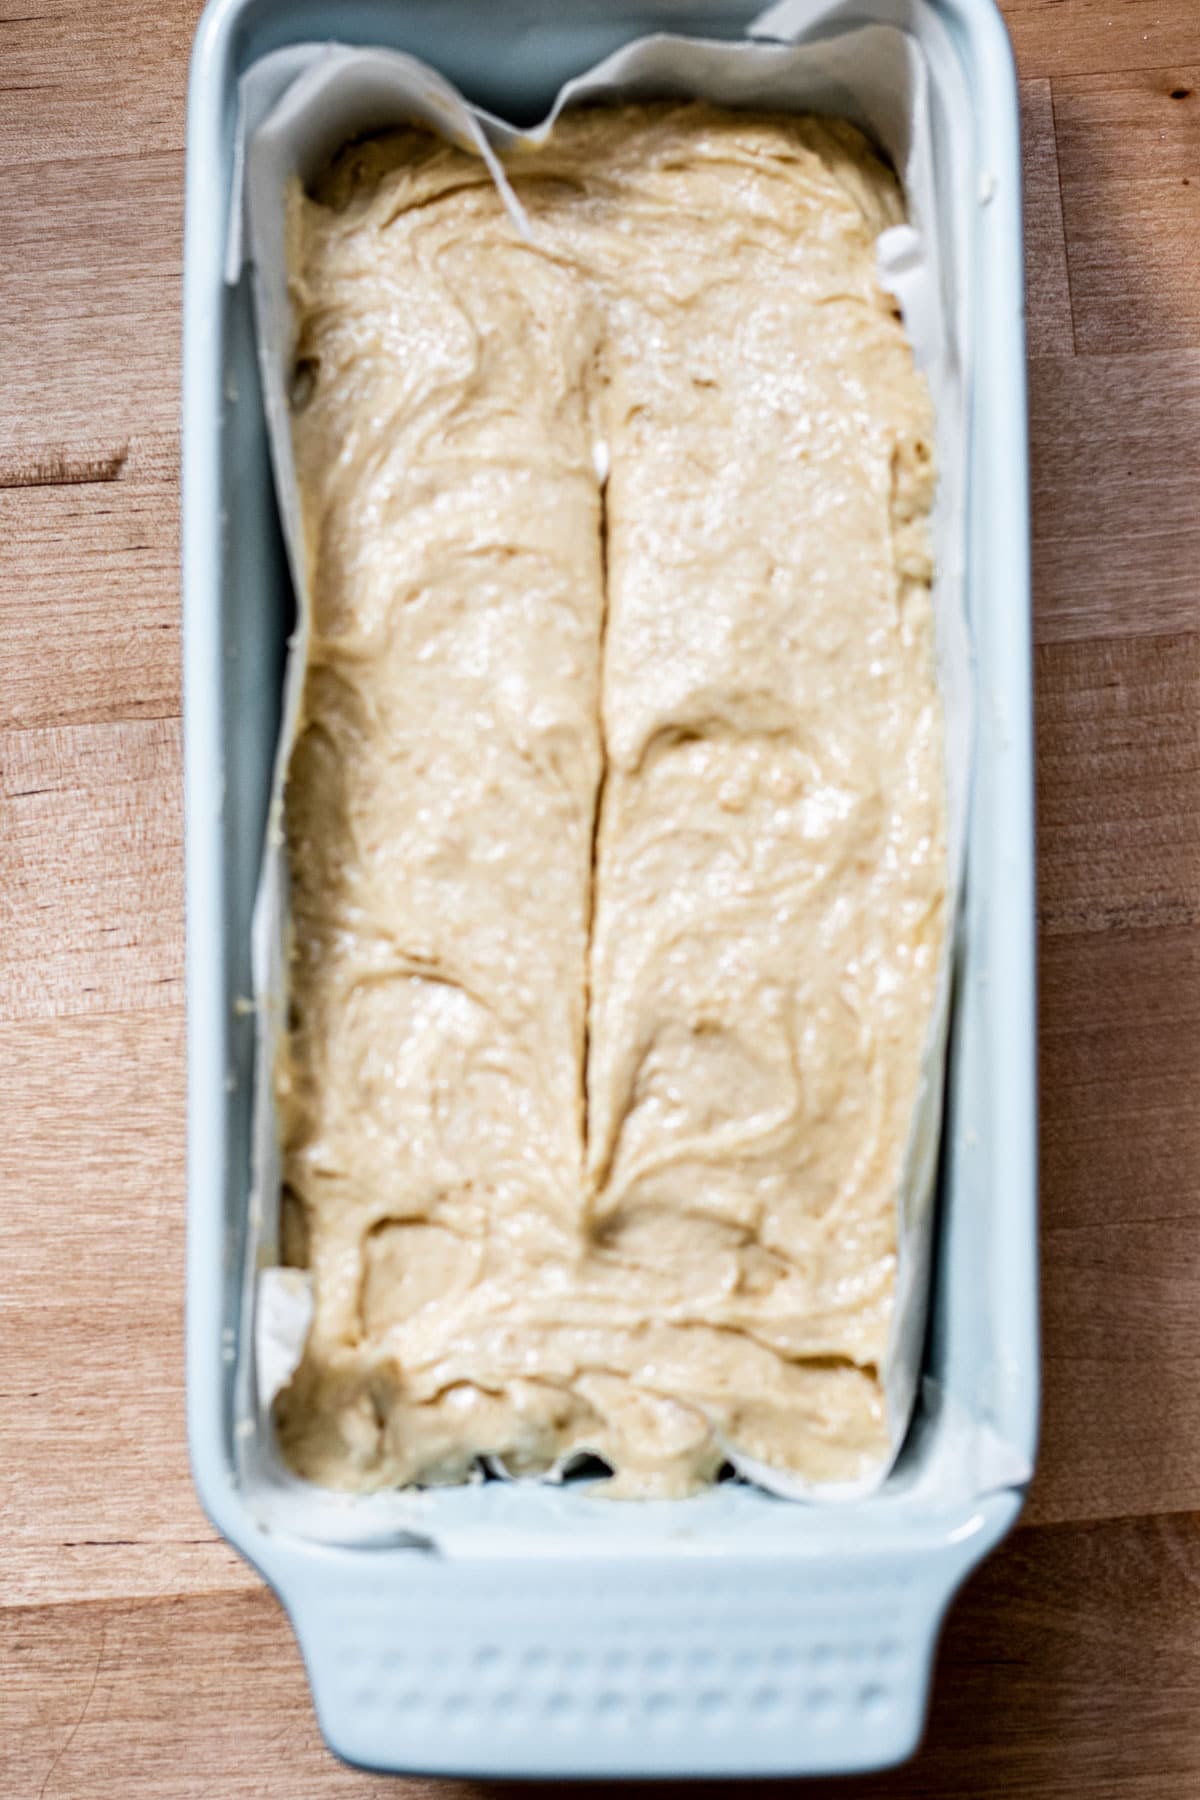
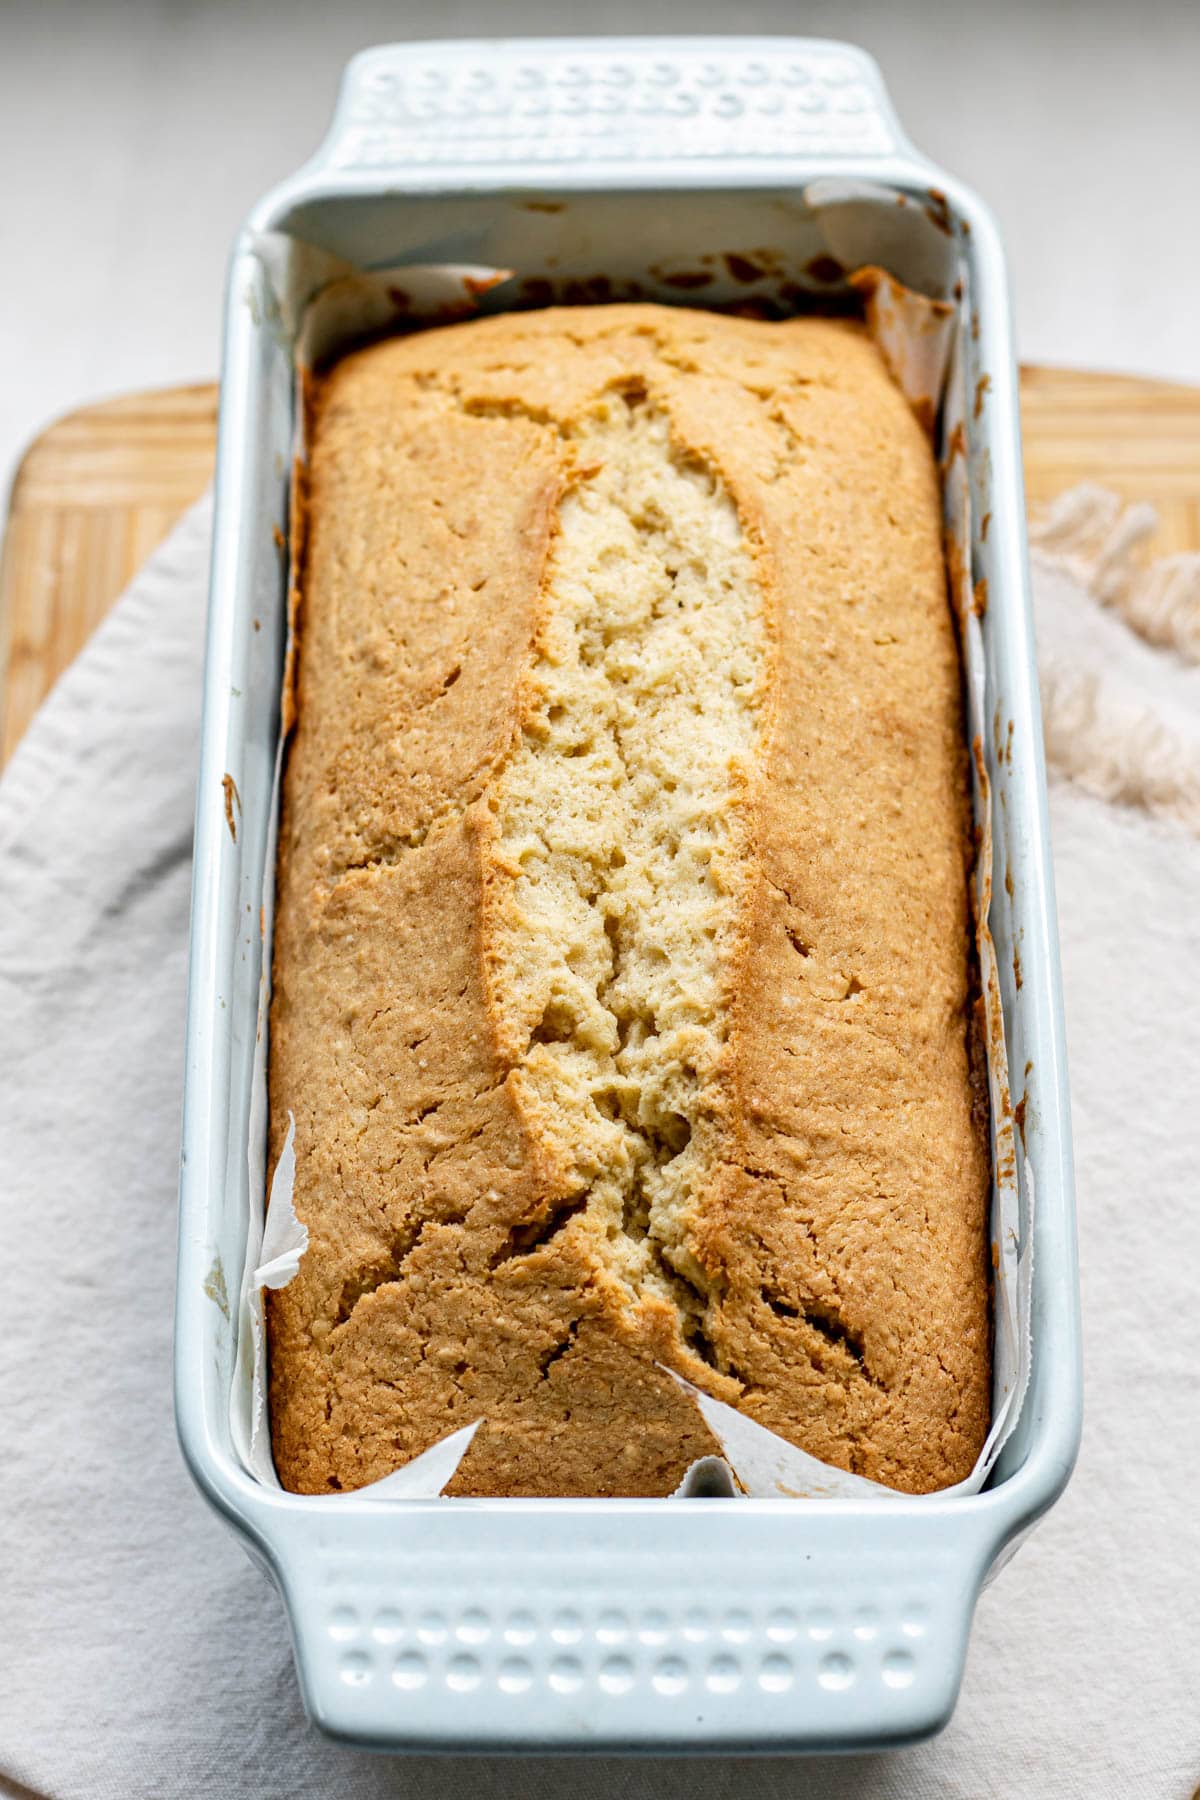
TIP #7 – Make a shallow slit down the center of the batter before baking.
This simple trick encourages the cake to rise evenly and crack right along the center, rather than in unpredictable spots. It acts like a guide for the expansion of the loaf as it bakes, giving you that beautiful bakery-style split top. It’s not just for looks—it helps control how the steam escapes.
TIP #8 – Use the “cold oven” method. Trust.
This old-school technique starts with a non-preheated oven, which encourages a slow, even rise. The result is a tender interior and gently golden crust, without overbaking the edges.
Flavor Pairing Ideas
🍓 Fresh berries + pound cake = elite.
🩷 Add a spoonful of rhubarb curd and a dollop of freshly whipped cream and you’ve got a spring dessert moment.
Quick Whipped Cream:
Whip 1 cup cold heavy cream with 1–2 tbsp powdered sugar and a splash of vanilla until soft peaks form. That’s it.
Storage
- STORAGE:
Once fully cooled, wrap the pound cake tightly in plastic wrap or store in an airtight container. It will stay fresh at room temperature for up to 3 days. You can also refrigerate it to extend freshness to 5–6 days, but bring it to room temp before serving for the best texture. - FREEZING:
This pound cake freezes beautifully! Slice it first (if you want to grab one piece at a time), then wrap each slice in parchment and store in a freezer-safe bag or container. It will keep for up to 3 months. To defrost, leave slices at room temperature or warm gently in the toaster oven. - REHEATING:
Not required, but a quick toast or 10 seconds in the microwave brings it back to life, especially if you’re adding jam, butter, or curd on top.

Leftover Ideas
Don’t let a single crumb go to waste! Listen, I doubt you will have leftovers but in case you do… here are some delicious ways to repurpose leftover pound cake:
- Pound Cake French Toast: Dip slices in a mixture of eggs, milk, and cinnamon, then cook on a buttered skillet until golden brown. Top with fresh fruit and maple syrup for a decadent breakfast.
- Pound Cake Trifle: Layer cubed pound cake with vanilla pudding and fresh berries in a glass bowl for an elegant dessert.
- Pound Cake Bread Pudding: Cube the cake and soak in a custard mixture, then bake until set. Add chocolate chips or nuts for extra indulgence.
- Toasted Pound Cake Croutons: Cut into cubes, toss with melted butter and cinnamon sugar, then bake until crispy. Perfect as a snack or dessert topping.
- Cake Pops: Crumble the cake, mix with frosting, roll into balls, insert sticks, and dip in melted chocolate for a fun treat.
Dietary Modifications
- Dairy Free – Use almond milk + apple cider vinegar in place of buttermilk and dairy free butter
FAQ
You can, but the texture won’t be the same. The oat flour adds tenderness and prevents that gritty, dry texture some gluten free pound cakes have. I highly recommend keeping the blend.
This old-school technique gives the cake a slow, even rise and helps create that beautiful crack down the center. It’s one of the secrets to the perfect pound cake texture.
It’s gently sweet—less than traditional pound cake, but still totally satisfying. The butter really shines without being overpowered by sugar.
Yes! It freezes beautifully. Slice it first, wrap tightly, and freeze for up to 3 months. Let it come to room temp or warm it gently before serving.
If you’ve tried this recipe, don’t forget to rate and comment!
🌟🌟🌟🌟🌟
Gluten Free Pound Cake
Ingredients
- 1 cup 1:1 all purpose gluten free flour I used King Arther brand
- 3/4 cup oat flour
- 1 tsp baking powder
- 1/4 tsp baking soda
- 1/2 tsp salt
- 8 tbsp unsalted butter 1 stick butter, room temperature
- 1 cup organic granulated sugar
- 3 large eggs room temperature
- 1 tsp vanilla extract
- 1/2 cup buttermilk alternatively for dairy free use 1/2 cup milk + 1 tsp apple cider vinegar – allow to sit for a few minutes
Instructions
- Line a loaf pan with parchment paper, leaving a bit of extra paper hanging over the sides. This overhang will make it easy to lift the cake out of the pan once it’s baked. Set aside.
- In a medium bowl combine dry ingredients: 1 cup of gluten free 1:1 flour, 3/4 cup oat flour, 1 tsp baking powder, 1/4 tsp baking soda, and 1/2 tsp salt – whisk well to combine – set aside.
- If you are using dairy free buttermilk, stir 1 tsp of apple cider vinegar into 1/2 cup of almond milk and allow to sit while you prepare the rest of the ingredients.
- Cut butter into cubes and add to the the bowl of a stand mixer using the paddle attachment (or use a bowl and a hand beater) – cream together the room temperature butter and sugar on medium speed for 2-3 minutes until light and creamy.
- Turn the mixer to medium low and add the eggs, one at a time, and the vanilla, beating well between each addition.
- Turn the mixer to low speed and add the dry ingredients, mix for 20 seconds until just combine – scraping the sides of the bowl down. Add the buttermilk and mix until well combined.
- Pour the batter into the prepared loaf pan and using a knife make a long vertical slit down the middle.
- Place the pan in a cold oven and turn the oven to 325°, cook for 60-70 minutes or until the top begins to brown slightly, the edges pull away from the pan and a tester inserted into the center of the pan comes out clean.
- Let the cake cool in the pan for 20-30 minutes. Then, using the parchment paper overhang, carefully lift it out of the pan and transfer it to a cooling rack to cool completely.
- Serve with fresh berries, freshly whipped cream, and/or homemade rhubarb curd or anyway you like to enjoy it!
Notes
Wrap tightly and store at room temp for up to 3 days. Freezes well in slices wrapped individually for easy thawing. **I have been loving these silicone loaf pan liners for easy storage**


Share Your Thoughts