The easiest homemade sauerkraut recipe in a mason jar, no special equipment needed.
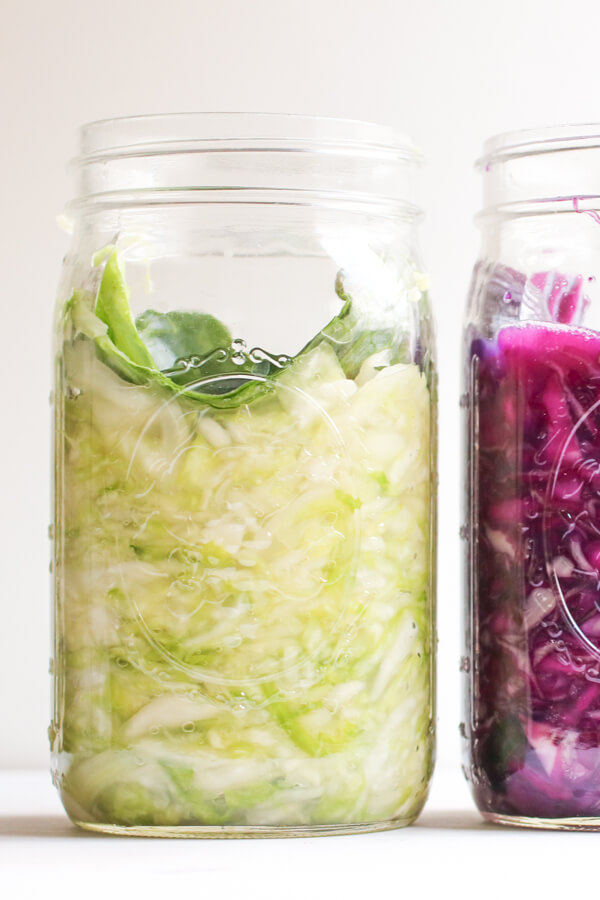
While every other food blog on the planet is starting off December with a cookie recipe, I thought I would rebel and give you sauerkraut 😉
Do. Not. Worry. I have cookies coming. Plus tons of amazing desserts and holiday recipes.
BUT…I have been thinking a lot about the toll the holidays can take on our bodies and I thought it would be more supportive to spend just a few minutes today (this very first day of December) talking about one of the easiest, and healthiest recipes on the planet.
Sauerkraut.
Sauerkraut is the original superfood, way before that word was even a thing. A traditionally fermented product, consisting of two simple ingredients; salt and cabbage, sauerkraut has been produced for over 4,000 years.
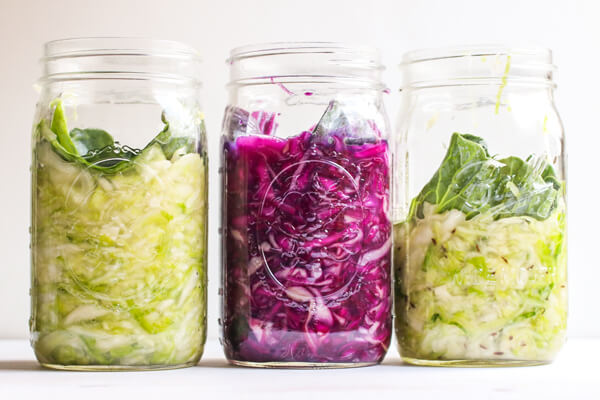
I've been making my own for about 5 years.
Admittedly, I was intimidated to ferment anything at first. I thought it was the type of thing that only matcha drinking Brooklyn hipsters with man buns did. I attended my first fermentation workshop several years ago with the king of all things pickled, Mr. Sandor Katz. Man-bun in place, matcha in hand, I am now a bonafide fermenting hipster. #NoShameInMyFermentingGame
Fermented foods, sauerkraut specifically, is an incredible health tonic due to it's superstar abilities to improve gut health and function. Gut health is vital to overall health.
This time of year it's important to remember that a healthy gut is essential for:
- A healthy immune system
- Reduced anxiety
So if you want to sail into the holiday season with less stress and less illness then this is the recipe for you. I am so in awe of the immense healing potential of fermented foods, I can't give you a recipe for sauerkraut without a little bit of a “Holy-toledo-can-one-food-really-do-all-that” lesson.
Are you ready to try your hand at the easiest sauerkraut recipe ever?? If you aren't interested in any of the health benefits of sauerkraut scroll on down for that recipe.
 Benefits of Fermentation
There are 4 main benefits of fermentation:
- Enrichment of the diet – Fermentation enriches the diet, it helps to encourage a diversity of tastes, aromas, and textures.
- Preservation – Fermentation helps to preserve food, which is why fermented foods have been produced for at least 4000 years! Way before refrigeration we had fermentation.
- Biological Enrichment – Fermentation biologically alters food, it improves the nutrient content including protein, essential amino acids, essential fatty acids, and vitamins. For instance, the vitamin C content in cabbage is increased by 600% after 7-days of fermentation. WHAT?? This fact blew my mind.
- Breakdown of anti-nutrients – Fermentation helps to breakdown toxins and anti-nutrients that may be found in food including phytates and agricultural chemicals,
Benefits of Sauerkraut
The benefits of sauerkraut are simply a health-promoting cascade stemming from the benefits of the fermentation process. A few additional standouts to know (basically so you can brag to your friend, who is currently eating Christmas cookies, that you just made your first batch of sauerkraut and here is why that makes you a better person ?)
- Low glycemic index – due to the content of organic acids which help to delay gastric emptying i.e. delayed gastric emptying = less impact on blood sugar levels
- Rich in probiotics – Typically we consider the healthy bugs in sauerkraut of the wild variety. Wild as in they haven't all been studied. However, studies show that sauerkraut is rich in the strain Lactobacillus plantarum.
- Contains indole-3 carbinol and glucaric acid (glucarate) which helps to improve estrogen metabolism
- Contains anti-fungal compounds
- Supports gut health via reducing increased intestinal permeability
 How to make the easiest homemade sauerkraut
Read full instructions below (with step by step photos) but here they are in a nutshell
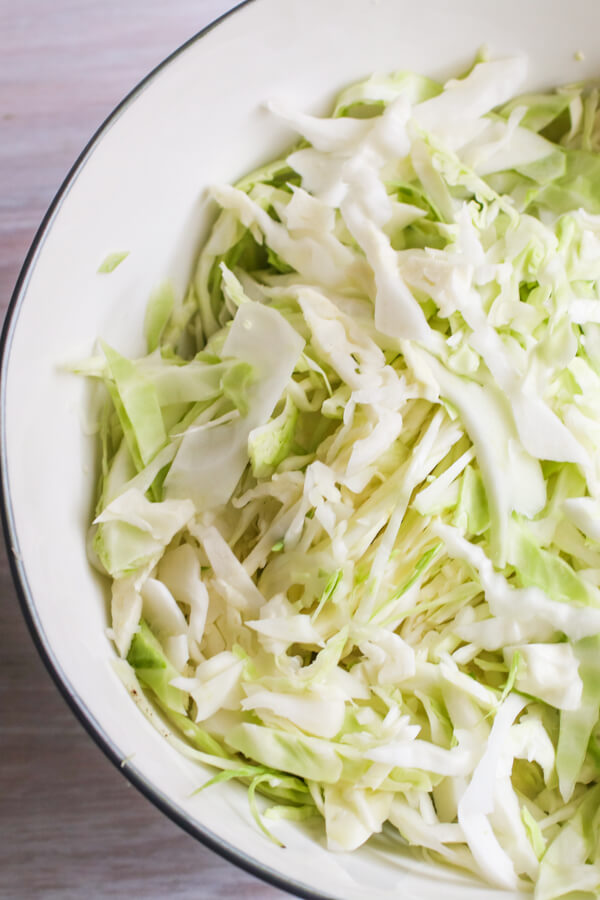
- Start with shredded cabbage and salt
- Massage salt into cabbage
- Place massaged cabbage into wide mouth mason jars
- Place a weight on top of cabbage (I use pickle pebbles, but you can also just use a smaller mason jar filled with dried beans)
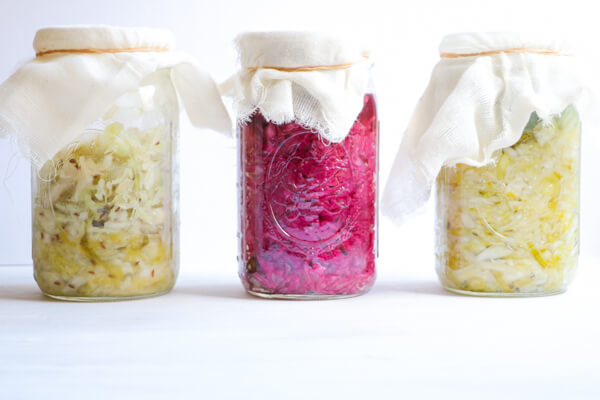
- Cover jars with cheesecloth
- Check for 24 hours
- Ferment for 3-10 days
- Remove cheesecloth, replace with mason jar lids. Place in fridge. Eat every day.
Two ingredients, a little bit of muscle, and some patience. You can totally do this!
I must also mention, my favorite store bought sauerkraut is nearly $14 at Whole Foods, I still love it and buy it when I don't have homemade, but a head of cabbage costs a few dollars and will make several large jars of sauerkraut. My frugal mind LOVES that!
More recipes and posts about gut health:
Gut Gummies – Healthy candy for a healthy gut
Benefits of bone broth
Health benefits of fermented food
[clickToTweet tweet=”This may just be the healthiest recipe in the history of the world. #TrueStory #GutHealth ” quote=”This may just be the healthiest recipe in the history of the world. #TrueStory #GutHealth “]
Thanks for reading Abra's Kitchen! If you make this recipe tag #abraskitchen on Instagram 🙂

Easy Homemade Sauerkraut
Ingredients
- 1 medium head cabbage (about 3-4 lbs.)
- 1.5 tbsp salt
Optional
- 1 tbsp caraway seeds
Equipment
- 3 32 oz. wide mouth mason jars
- cheesecloth
- pickle pebbles, or jar weights (just another smaller wide mouth mason jar also works)
Instructions
- Start with a clean surface including hands and all equipment you are using.
- Remove the outer leaves of the cabbage. DO NOT WASH THE CABBAGE. The beneficial bacteria is in the cabbage, don't wash it all away. I prefer to use organic cabbage as to avoid pesticide exposure.
- Slice the cabbage by first slicing in half, then in quarters. Remove the core and slice the cabbage lengthwise into thin ribbons
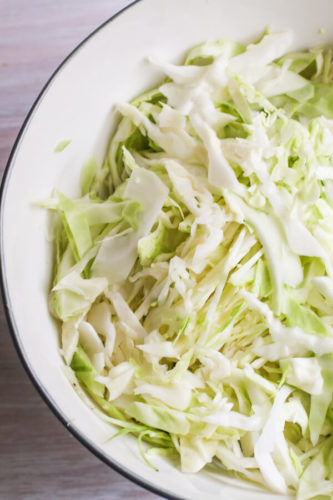
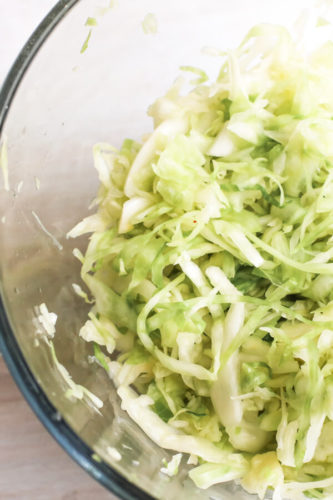
- Place the cabbage into a large bowl and sprinkle with salt. Using clean hands, massage the salt into the cabbage. Continue to massage and squeeze the cabbage for several minutes. This requires putting a little muscle into it. Gradually the cabbage will become watery and limp. This should take 5-10 minutes.
- Your cabbage should begin to look like this once you've properly given it a good rub down.
- If you are using caraway seeds or any other spice add it now.
- Pack the cabbage into your wide mouth mason jars. Really punch the cabbage down with your fist to attempt to pack the cabbage in and allow the liquid to rise to the surface. Ideally you want the cabbage to be fully immersed in liquid (the liquid that you have produced by rubbing the salt into the leaves). Pour any additional liquid from the bowl into the jars with cabbage. Fill the jars a little more than 3/4 full.
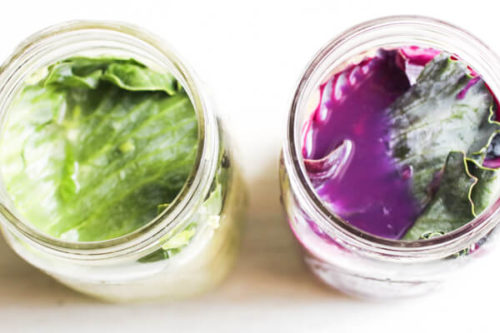
- Optional – Use one of the larger reserved outer cabbage leaves over the surface of the sliced cabbage. This will help to keep the cabbage submerged.
- Once all of the cabbage has been placed into jars, use either a pickle pebble or another smaller mason jar filled with pebbles or dried beans to weigh down the cabbage and allow the cabbage to remain submerged in liquid.
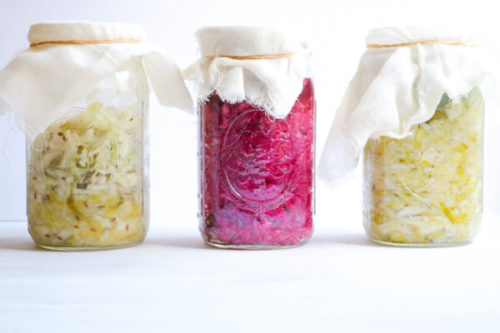
- Cover the mouth of the jar with cheesecloth and a rubberband or twine. This will allow air to pass in and out of the jar while still keeping creepy crawlers out.
- For the first 24 hours of fermentation you will need to open the jars and press the cabbage down every so often. I call this step “punch the cabbage”. This is to ensure that the cabbage stays submerged and over time the cabbage will become more limp and compact and the liquid will rise to the surface.
- If after 24 hours you find that there isn't enough liquid, dissolve 1 tsp salt into 1 cup of water and add more liquid to the cabbage.
- Ferment the cabbage for 3-10 days. After 3 days taste the cabbage, I tend to like cabbage at the 7 day mark, but if you like a milder ferment you can stop the fermentation process at 3 days. Keep in mind that you reach peak nutrition around day 7.While the cabbage is fermenting you may see bubbles rise to the surface, this is ok! That is fermentation working. If you see scum rise to the surface you can skim that off and if any mold begins to appear remove it and do not eat that bit.
- Once you have reached your desired level of fermentation, remove the cheesecloth, and weights from the jar and close with regular mason jar lid. Store in fridge for 2 months or longer. My rule of thumb is as long as it still tastes good, it's good to eat.
Notes
- Type of cabbage – you can use napa cabbage, red cabbage, green cabbage, or really any kind of cabbage. They all work!
- Temperature – try to keep your sauerkraut at a relatively cool room temperature while its fermenting. I just leave mine on my kitchen shelf away from sunlight or any direct heat source.


 Benefits of Fermentation
 How to make the easiest homemade sauerkraut


A German friend of mine would use equal amounts of fresh cabbage and sauerkraut mixed, if she thou her kraut was too salty when she went to serve it, especially if she was making it in a cooked recipe
great tip! thanks for sharing.
Hi there, newby mistake here. Followed the steps but I forgot the weights to keep the cabbage down and now I’m on day 4. Did I ruin the whole thing? I still see no bubbles or too much liquid, but it’s limp alright.
Is the cabbage submerged in liquid? Just squish it down with a larger leaf of cabbage to make sure it is submerged and you should be fine!
I was wondering whats the smallest amount if salt I can to use?I have high blood pressure and was told to limit my salt in take.
Hi Tammy,
Salt is an essential part of the fermentation process as it helps to pull the water from the cabbage to create the perfect fermentation environment. Without the right amount of salt, you are also creating an environment that is more susceptible to mold. The general formula is 1 tbsp of salt per 1 3/4 lbs. of vegetables. You can weigh your cabbage and then use the proper amount of salt from there. Hope that’s helpful!
My Grandmother did her sauerkraut like this:
-sterilize jars and lids in boiling water 10 minutes, then leave in simmering water along with rings
-slice/chop cleaned cabbage
-pack cabbage tightly up to shouler/bottom of jar neck into a jar you just removed from simmering
water
-put one tsp of pickling salt on top of cabbage
-gently drizzle simmering water (that you had boiled in teakettle for 10 minutes) over the salt til
cabbage is covered
-release air from jar by using the tool designed for this step and found in canning kit
-pack cabbage down again adding more simmering water if needed to cover cabbage but leave 1/2
inch head space
-wipe mouth and threads on neck of jar to remove anything that could interfere with sealing
-remove hot lid from simmering water using magnet from canning kit and place on jar
-remove hot ring from simmering water and place on jar
-using cloth to avoid burns, snugly/fingertip tighten lid
-store jars in cool dark place, check in 24 hours and daily for a while to make sure lids have sealed and
formed vacuum
-if vacuum seal not formed at 24 hours remove that jar to fridge for safety (instead of going on and
tightening the ring and leaving at room temp which would allow germs to enter)
She taught:
– boiling sterilizes water to be put in kraut, and the jars and lids
-working one jar and lid at a time keeps others in sterile condition til ready to pack
-closing with hot lids and rings helps with sealing
Her kraut was always so goood… salty and sour and so crunchy!!
She did not water bath kraut. She said it would soften the kraut. I don’t really know if she knew about the probiotics and health benefits other than it being a nourishing home canned food. And, it was our delight as kids to sneak into her cool, dark cellar amid all those hopping white crickets that lived in her cellar..ugh!….to get a a jar of kraut to snack on.
She seldom lost a jar of kraut and none of us ever got sick from her kraut or other home canned foods.
Of course, she water bathed and pressure canned other foods as required, even her pickles, just not her kraut.
I know waterbath is now recommended by experts and I’m not recommending that anyone use my Grandmother’s method because of safety. But I am curious…does anyone remember this method being used by their Grandmother or Mother?
My aunt and my mother both use your mom’s way of making it. It was best you could get. I was hunting this recipe. I didn’t think I was going to find it. Thanks for printing it
Yes my mom and aunt made their kraut like this also ! Was looking up recipes and I knew Thais were not the way I had watched back several years ago as a child. Great to find this recipe now that both have passed so sorry I did not pay more attention to my elders as the way they prepared things☹️
Oh Naomi I feel you! I wish I spent 1000 more hours in my great aunt mamie’s kitchen taking notes!
Heat processing sauerkraut kills the
Probiotics..making it not worth eating
Thank you for posting this. I used to make it this way and lost very very few jars . I’m gonna put up some more this year. Again thanks for posting.
Do you jave to use canning salt or can you use Morton table salt?
I use kosher salt, I would recommend not using table salt.
I’m a little confused about weighting the cabbage
down….it said you could use another jar..how
would you do that as the mouth needs to be covered with cheesecloth? If using beans, what do you put them in?
Thank you for answering!
I add beans to a small jar that fits inside the mason jar, Let me try to take a photo of this arrangement and update the recipe this weekend. It’s easier to see 🙂
How do I know when it’s ready? It’s been 9 days and the taste is good but I think it’s still a little to crisp?
Great recipe though and very east to make. I agree with a previous comment, I thought it would stink up the house…it does not!
Thanks!
It’s ready at 9 days for sure, you can go a little bit longer if you’d like it more tender but it will continue to ferment and may become too salty for you.
That’s what is so good about this homemade sauerkraut, is the crisp
Going to make today! Can’t wait to sample the results.
I also want to make kimchi. Do you have this as a recipe?
Many thanks
Weri
Yay! I don’t have a kimchi recipe yet… but I’ve purchased all of the ingredients to make it about 200 times, so someday I’ll get to it 🙂
Let me know how your sauerkraut works out!
How to make Kimchi at home – makes 1 quart
1 med head (2lbs) Napa Cabbage
1/4 c sea salt or kosher salt
Water
1 Tbs grated Garlic (5 to 6 cloves)
1 tsp grated Ginger
1 tsp Sugar
2 to 3 Tbs Fish sauce
1 to 5 Tbs Korean red pepper flakes (Gochugaru)
8 oz Daikon Radish, peeled and cut into matchsticks
4 Scallions, trimmed and cut into 1-inch pieces
Remove core from Cabbage and slice into 2-inch wide strips.
Place Cabbage and salt into large bowl, massage with hands until Cabbage softens, add water to cover cabbage, weigh it down with a plate and let sit for 1 to 2 hours.
Rinse and drain cabbage 3 times with cold water and drain in colander for 15 to 20 minutes.
Rinse and dry bowl used for salting, set aside to use later.
Combine Garlic,Ginger, sugar and fish sauce in a small bowl and mix to make a smooth paste. Mix in the Korean pepper flakes, using 1 Tbs for mild and up to 5 Tbs for spicy (I like 3 1/2 Tbs)
Gently squeeze any remaining water from cabbage and return it to cleaned bowl along with the Radish sticks, scallions and seasoning paste.
Using your hand, wearing gloves is recommended) gently work the paste into the vegetables until they are thoroughly coated.
Pack the Kimchi in a jar pressing down on it until the brine rises over the vegetables. Leave at least 1-inch headspace. Seal the jar with a lid, let stand at room temperature 1 to 5 days. You may see bubbles inside the jar and brine may seep out. Place jar on a plate to catch brine overflow. Check Kimchi daily, pressing down to keep submerged into brine. Taste a little daily until it is to your liking. Refrigerate when done. Eat a little daily.
I can’t wait to make this! Thanks for the recipe Irene 🙂
My MAMAW always boiled her sauerkrout and let them seal and turn them upside down and set them in a dark place and kept them there until they’re ready to be used. Sometimes she would also cut up a small green tomato you put into my jars or a jalapeno
Love hearing how older generations did it! I wouldn’t recommend boiling the sauerkraut though, that will kill all of the beneficial gut bacteria!
This is more like making pickles, it won’t ferment. Fermantion needs to be uncooked, raw and it has to get air, others the glass will bust because the bacteria make too much pressure. If you only want an easy, low calorie snack you can pickle it, but if you want the good bacteria you’ll have to ferment it.
This looks like such a straightforward and easy recipe! Can’t wait to make this one at home. Thank you so much for sharing your recipe!
I can’t wait for you to try it Billy! Thanks for the comment 🙂
I like my homemade sauerkraut, but it’s pretty salty. If I rinse it to reduce the sodium content, am I also rinsing away the by-products of fermentation?
I used to assume making sauerkraut would stink, and I was delighted to learn it doesn’t. If that’s holding anyone back from fermenting their own, give it a try!
That is such a great question, I honestly don’t know but I will find out for you. My instinct is that you will lose a little bit of the nutrients by rinsing but not all. Also, you could make it with less salt, a little is necessary but you could reduce the amount.